How To Calculate And Adjust For First Step
This step is critical and I can't tell you how many times I came across a set of stairs that didn't calculate or adjust for the first step, while laying out their stair stringers.

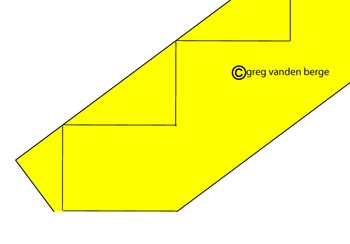
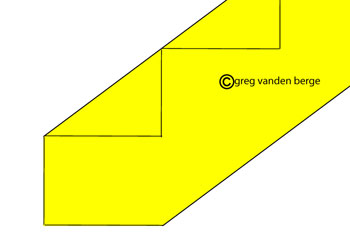
I placed a few illustrations like the one above and the next four below, to give you a better idea, how to calculate and adjust for the first step, while laying out a stair stringer. I basically flipped a stair stringer that has already been laid out into the position it will be installed and will remove one section at a time, to provide you with a little more information, if necessary.

In the illustration above, I removed the section of the stair stringer that will be sitting directly on the floor.

In the illustration above, I removed the section of the stair stringer layout, in order to reveal the first riser.

In the illustration above, I removed a section to reveal the second riser and first tread.

The illustration above provides you with a realistic view of what your stair stringer would look like after it was cut and ready to install. Again, I put these pictures in to provide those who need a little more information and are having a difficult time, trying to figure some of the stuff out.

In the illustration above, I placed the finished stair stringer on top of a floor. Remember, I haven't done any modifications yet and if the stairs are built without making any adjustments, with the exact calculations, the stairway will end up with a taller riser at the bottom.

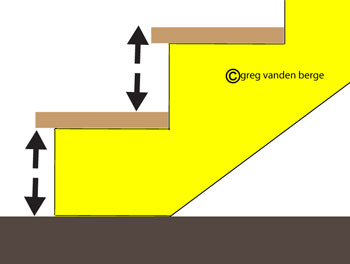
Here's a better example of what I'm talking about. The illustration above shows two equally spaced stair risers, until we place our stair treads on top of the stringers.

Now is when you can clearly see the problem. The
bottom riser is the exact vertical width or height of the stair tread or
step... taller than the next riser.
For example, if I'm using a 1 inch thick stair tread, along with equally
spaced risers, then the bottom step will be 1 inch taller than the rest
of the equally spaced risers on the stairway.

This is why it's important to cut and remove the width
of the stair treads from the bottom of the stair stringer, during the
layout phase of the project.
You're basically dropping the entire stairway or should I say stringers
down, the vertical height of the installed stair treads.
This is important, if the stair stringers are going to sit on top of anything, or be built into another part of the building, then you will need to calculate and adjust for these measurements also.

The illustration above provides you with an example of what the stairway would look like, after you removed the tread thickness from the bottom of your stair stringers.

The only way to end up with equal spaced and sized stair risers, will be to calculate and adjust for any additional materials needed to build the stairway.
Back To How To Do It Yourself / How To Figure And Calculate Stair Stringers / How To Layout Bottom of Stair Stringer


