


How To Layout Bottom of Stringer For Concrete
There is one thing you should
understand, before you learn how to layout the bottom of the stair
stringer for a concrete foundation or
pad. If you can avoid it, try to
prevent regular construction standard lumber from touching
concrete,
especially concrete that has the possibility of absorbing moisture.
This wouldn't include treated material, but keep in mind that treated
material will rot and disintegrate over time, just like construction
standard lumber, if it's in direct contract with moisture.
If you're looking for more information on how to
layout the stair stringer, go back a few steps. The steps you're looking
for can be found near the bottom of the page.
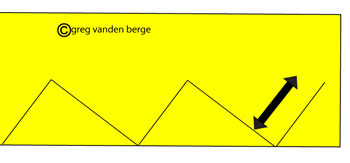
The illustration above provides us with a stair stringer layout, with
all of the treads and risers marked. All that's left is to finish the
bottom layout and the stringer will be ready to cut.
At this point, I'm assuming you already understand
how to calculate and adjust
the first step. If not, go back and revisit this page.
The stair stringer for our example, will be sitting on top of 2 x 4
treated lumber and it will need to be deducted, along with the thickness
of the stair tread, from the bottom of the stringer, in order for the
first riser, to be the same vertical height as the rest of the risers.
Don't make any mistakes on this calculation and don't forget to double
check these measurements, after the stair stringers have been positioned
properly, but before they are nailed off permanently.
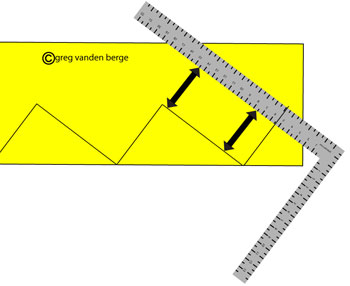
For our example, we started with a 7 1/2 inch total
rise and will need to deduct an inch and a half for the treated lumber
and an additional inch or the stair tread.
This leaves us with a distance of 5 1/2 inches between the first step on
the stair stringer and the bottom of the stair stringer.
You will need to adjust your stair stringer accordingly, if your
measurements are different.

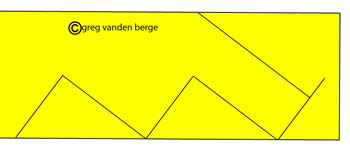
Here's what the stair stringer would look like if rotated into its proper position, but hadn't been cut yet. Illustrations like these often make it easier for some of us to visualize the process in our mind, before we cut our first board.
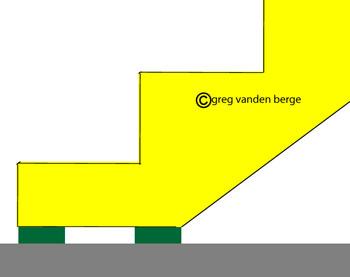
This is what the stair stringer would look like if it was sitting on top of a concrete pad or foundation, before attaching the treads and risers.
Sometimes a picture is worth a 1,000 words and if that
is the case, then I can quit typing right now.
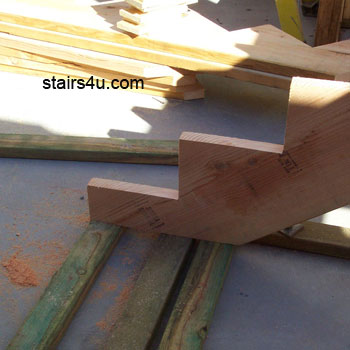
The photograph above provides you with an excellent example of a stair
stringer cut out of Douglas fir or construction standard lumber, sitting
directly on top of treated lumber that has been attached firmly to a
concrete foundation.
Back To How To Do It Yourself / How To Figure And Calculate Stair Stringers / How To Layout Bottom of Stair Stringer